Access
Connect cross-platform accounts & identity management
Get a 360 view on game health by combining crash reporting, performance analytics, build quality and binary distributtion into one toolbox
To be able to receive events and the player actions log, you have to set up a data warehouse. The Game Telemetry service supports several different data warehouses by default, and AccelByte can work with you to integrate a data warehouse that we don’t yet support.
We’ll create a connector for you in Kafka Connect to pull event data from Kafka and write the data to Redshift. Nested data will be flattened in the Game Telemetry pipeline before getting pushed into Kafka. Each payload attached to the events will be converted into a Redshift column. You can see the payload for each event in the list of AccelByte Telemetry Events (opens new window).
AccelByte can integrate the Game Telemetry pipeline with Redshift for you. To do so, you’ll need to send us the following information:
After we input that information into Kafka Connect, the connector will be created and the pipeline will automatically send game Game Telemetry data to Redshift.
AccelByte can integrate the Game Telemetry pipeline with S3 for you. To do so, you’ll need to send us the following information:
After we input that information into Kafka Connect, the pipeline will automatically send Game Telemetry data to your S3 bucket.
If you use Snowflake as your data warehouse, you can set it up in Admin Portal by following the steps below.
IMPORTANT
To connect Snowflake to AccelByte Cloud, first complete the following prerequisites in the Snowflake application:
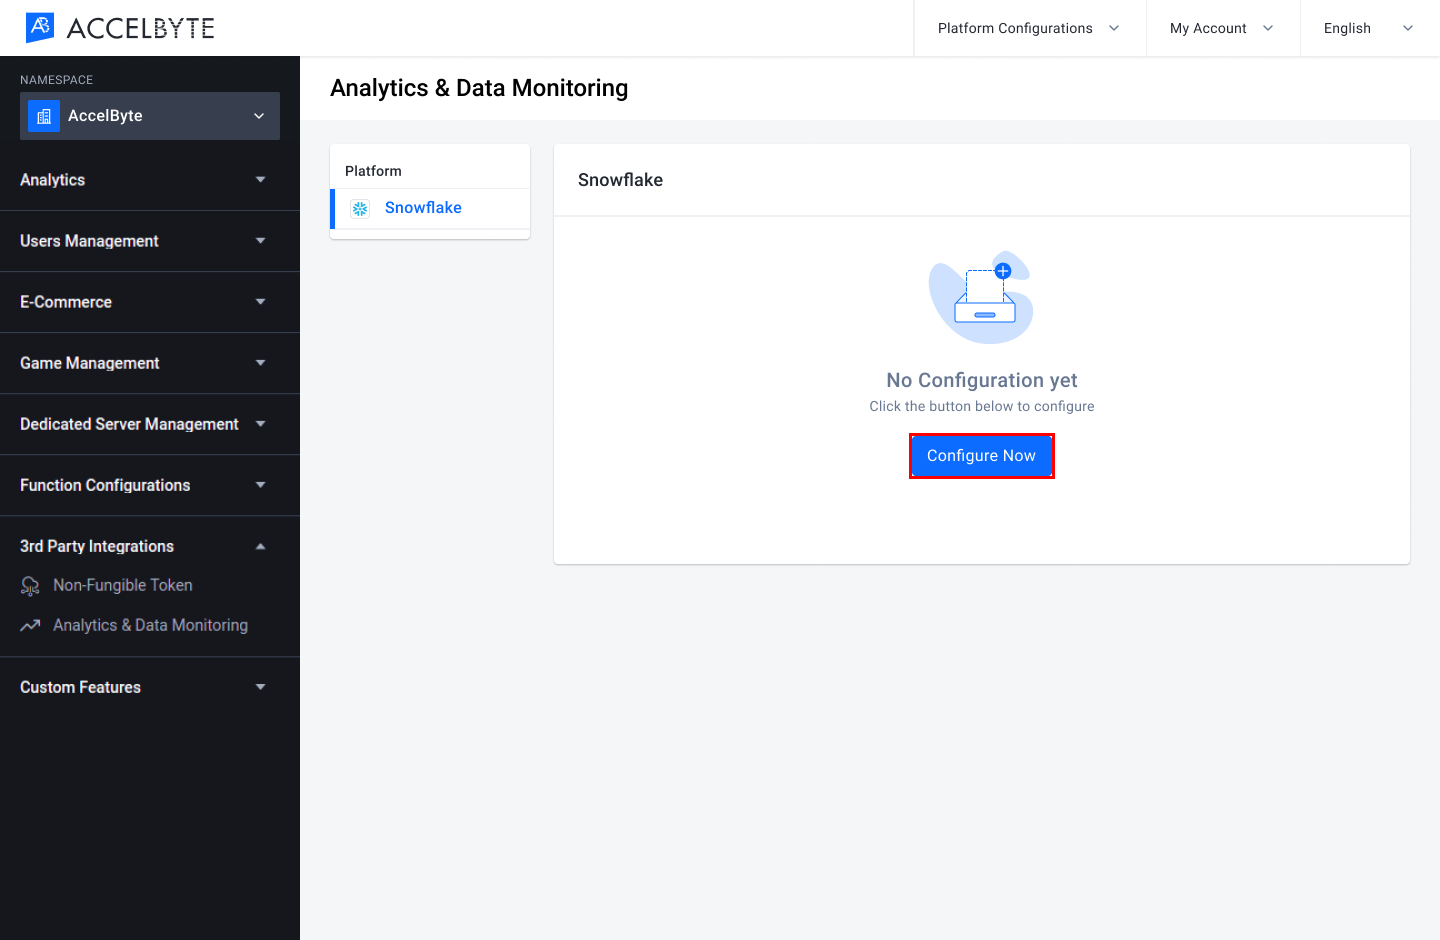
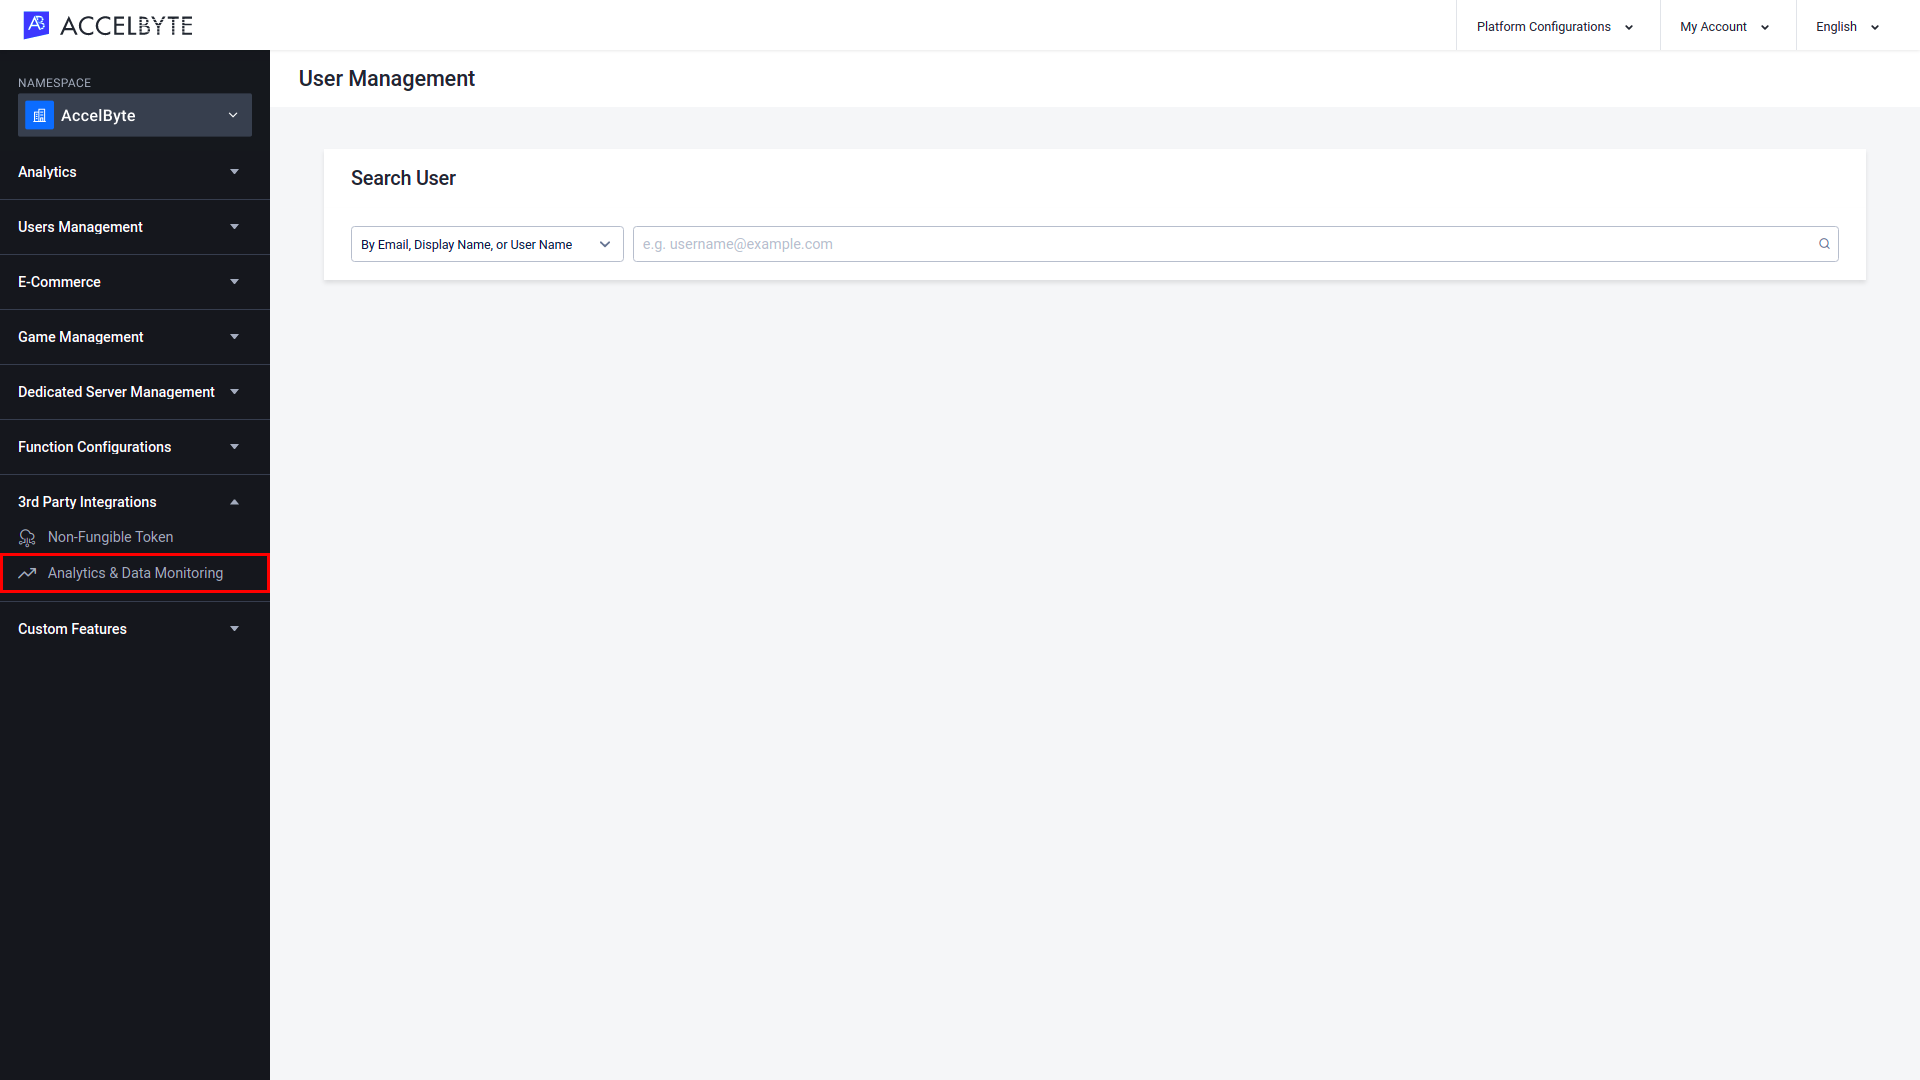
In the publisher namespace of the Admin Portal, go to the 3rd Party Integrations section and open the Analytics & Data Monitoring menu.

In the Analytics & Data Monitoring menu, click Configure Now.
The Add Snowflake Configuration form appears. Fill in the fields with the following information:

Enter the Snowflake username of the user that will be responsible for this data in the Snowflake Username field.
Enter your Snowflake account ID in the Account ID field.
NOTE
The Snowflake Account ID is the prefix before snowflakecomputing.com in your Snowflake account url. Example: if your Snowflake URL is rsa42644.us-east-1.snowflakecomputing.com then the account ID is rsa42644.us-east-1.
Enter the destination database’s name in the Database Name field.
Enter the schema of the database used for the integration in the Schema field.
Choose how you want to store the data in the Model field. There are two model options:
When you’re done, click Continue.
The Connect to Snowflake form will appear along with a Public Key. Copy the Public Key and paste it in your Snowflake Worksheet to set the connection.

NOTE
This step must be completed before you can proceed to the following steps.
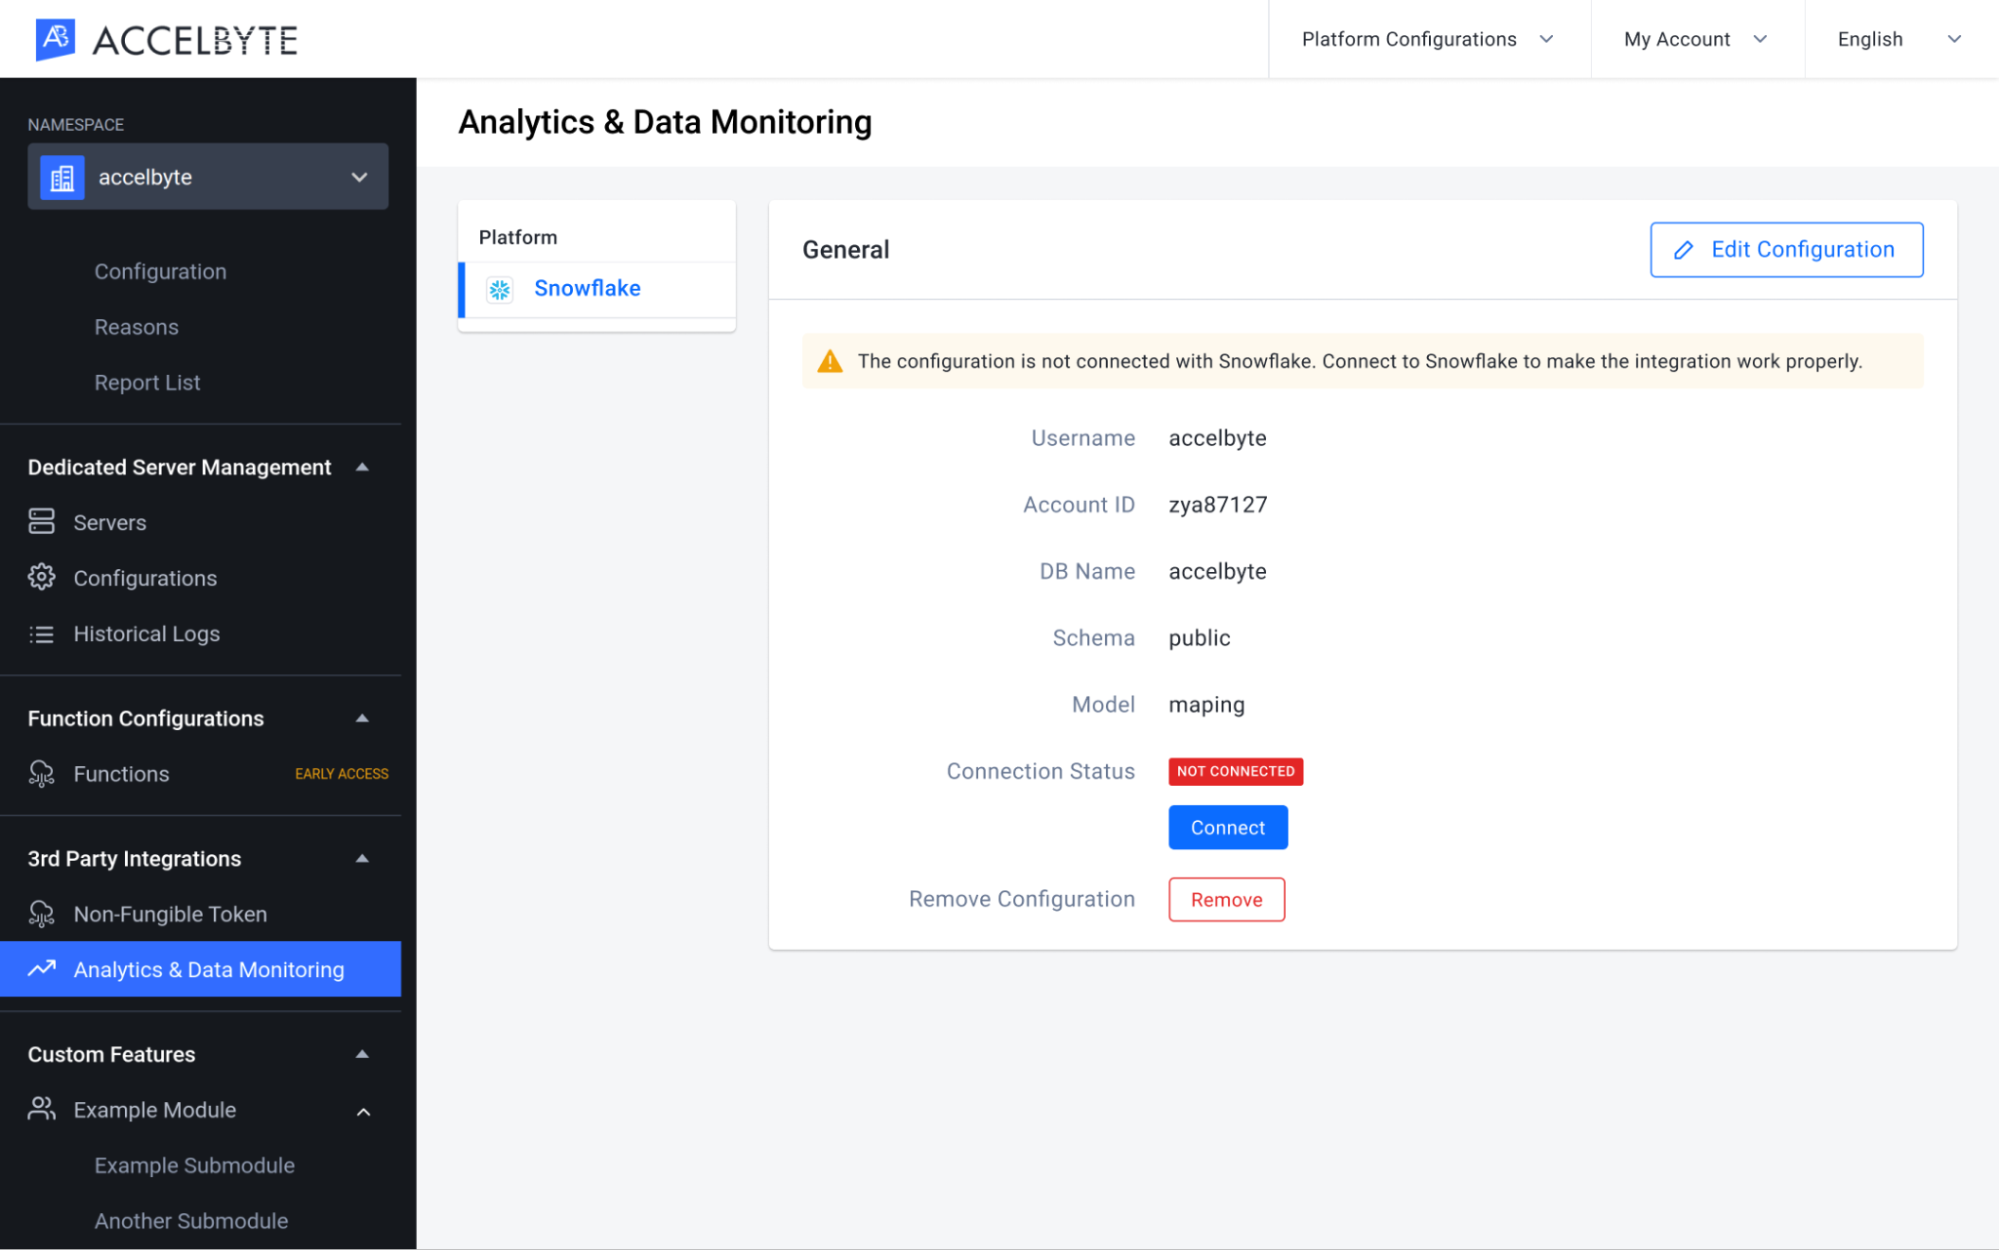
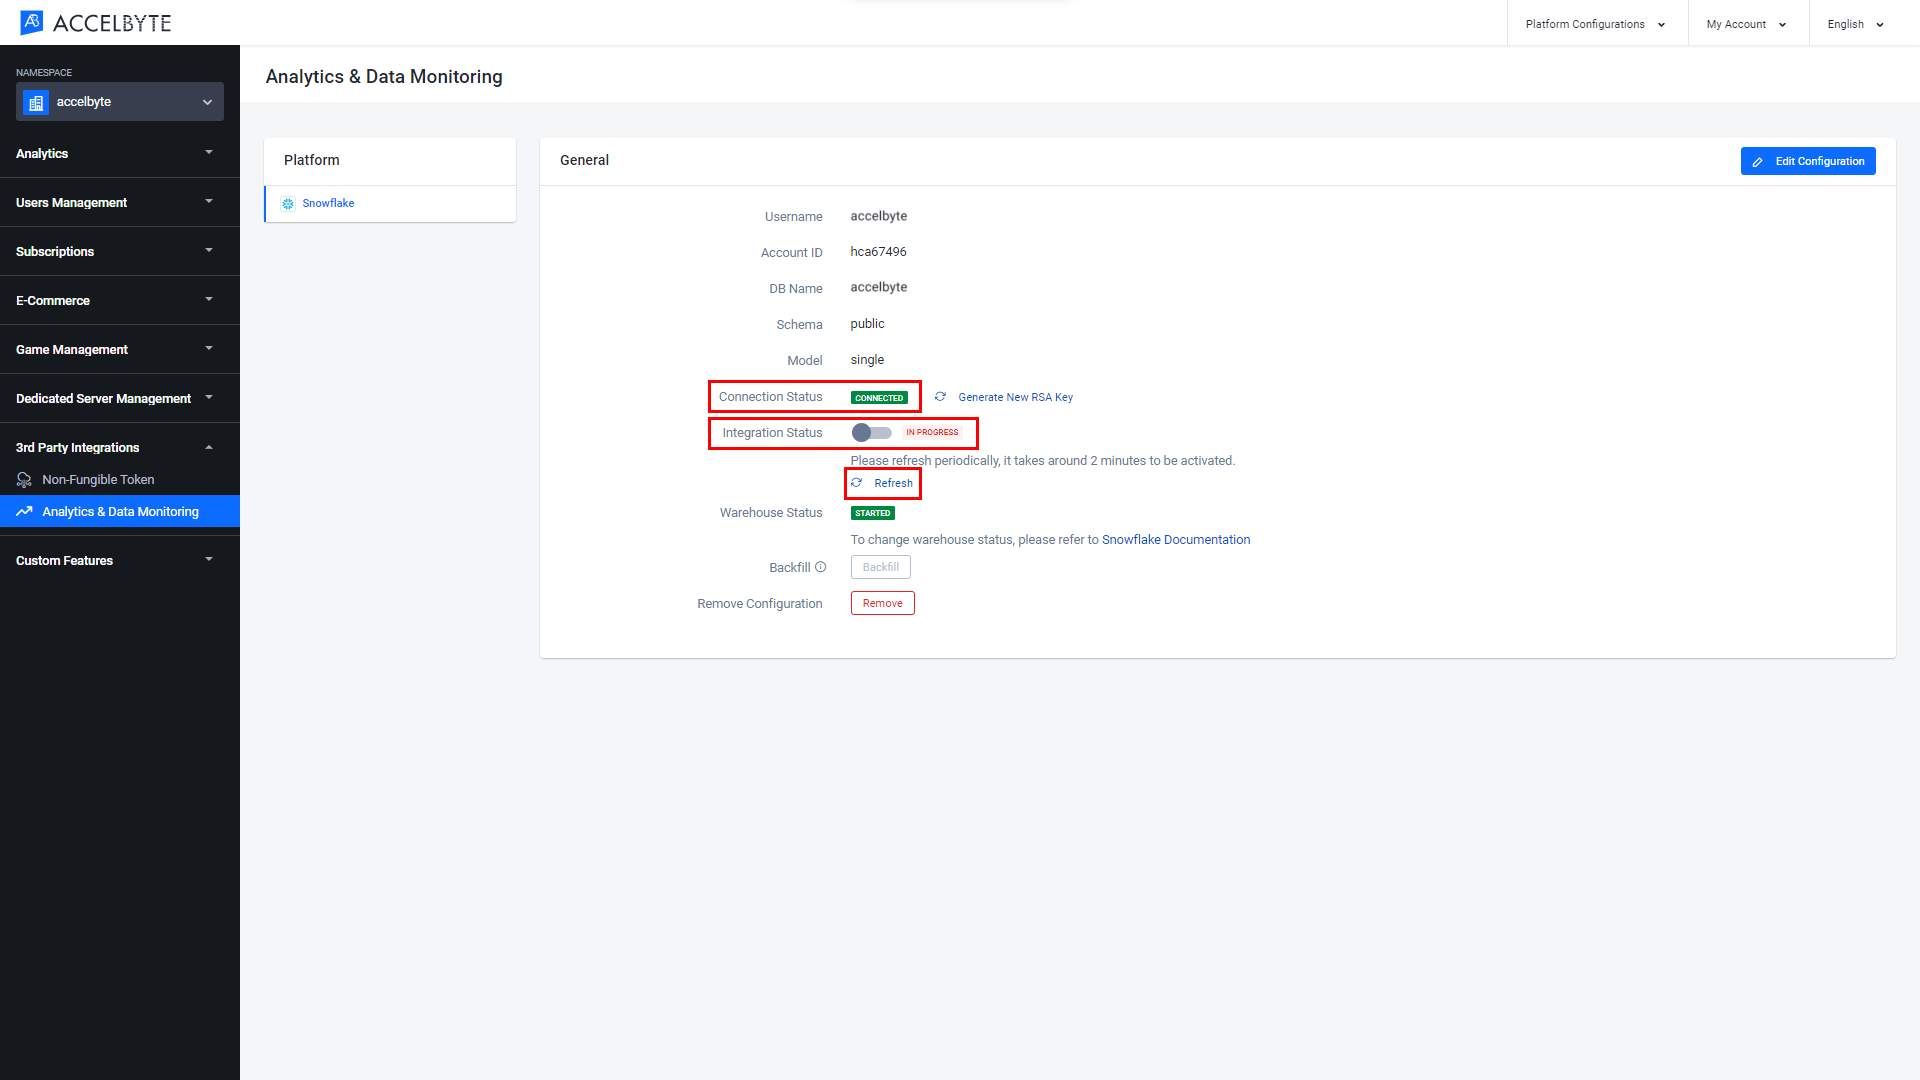
Click the Integration Status toggle to switch it to Activate. You will be redirected to the Analytics & Data Monitoring page and your Connection Status will be changed to Connected. Your configuration may still be in progress. If so, you can refresh the page to update the status of your configuration.

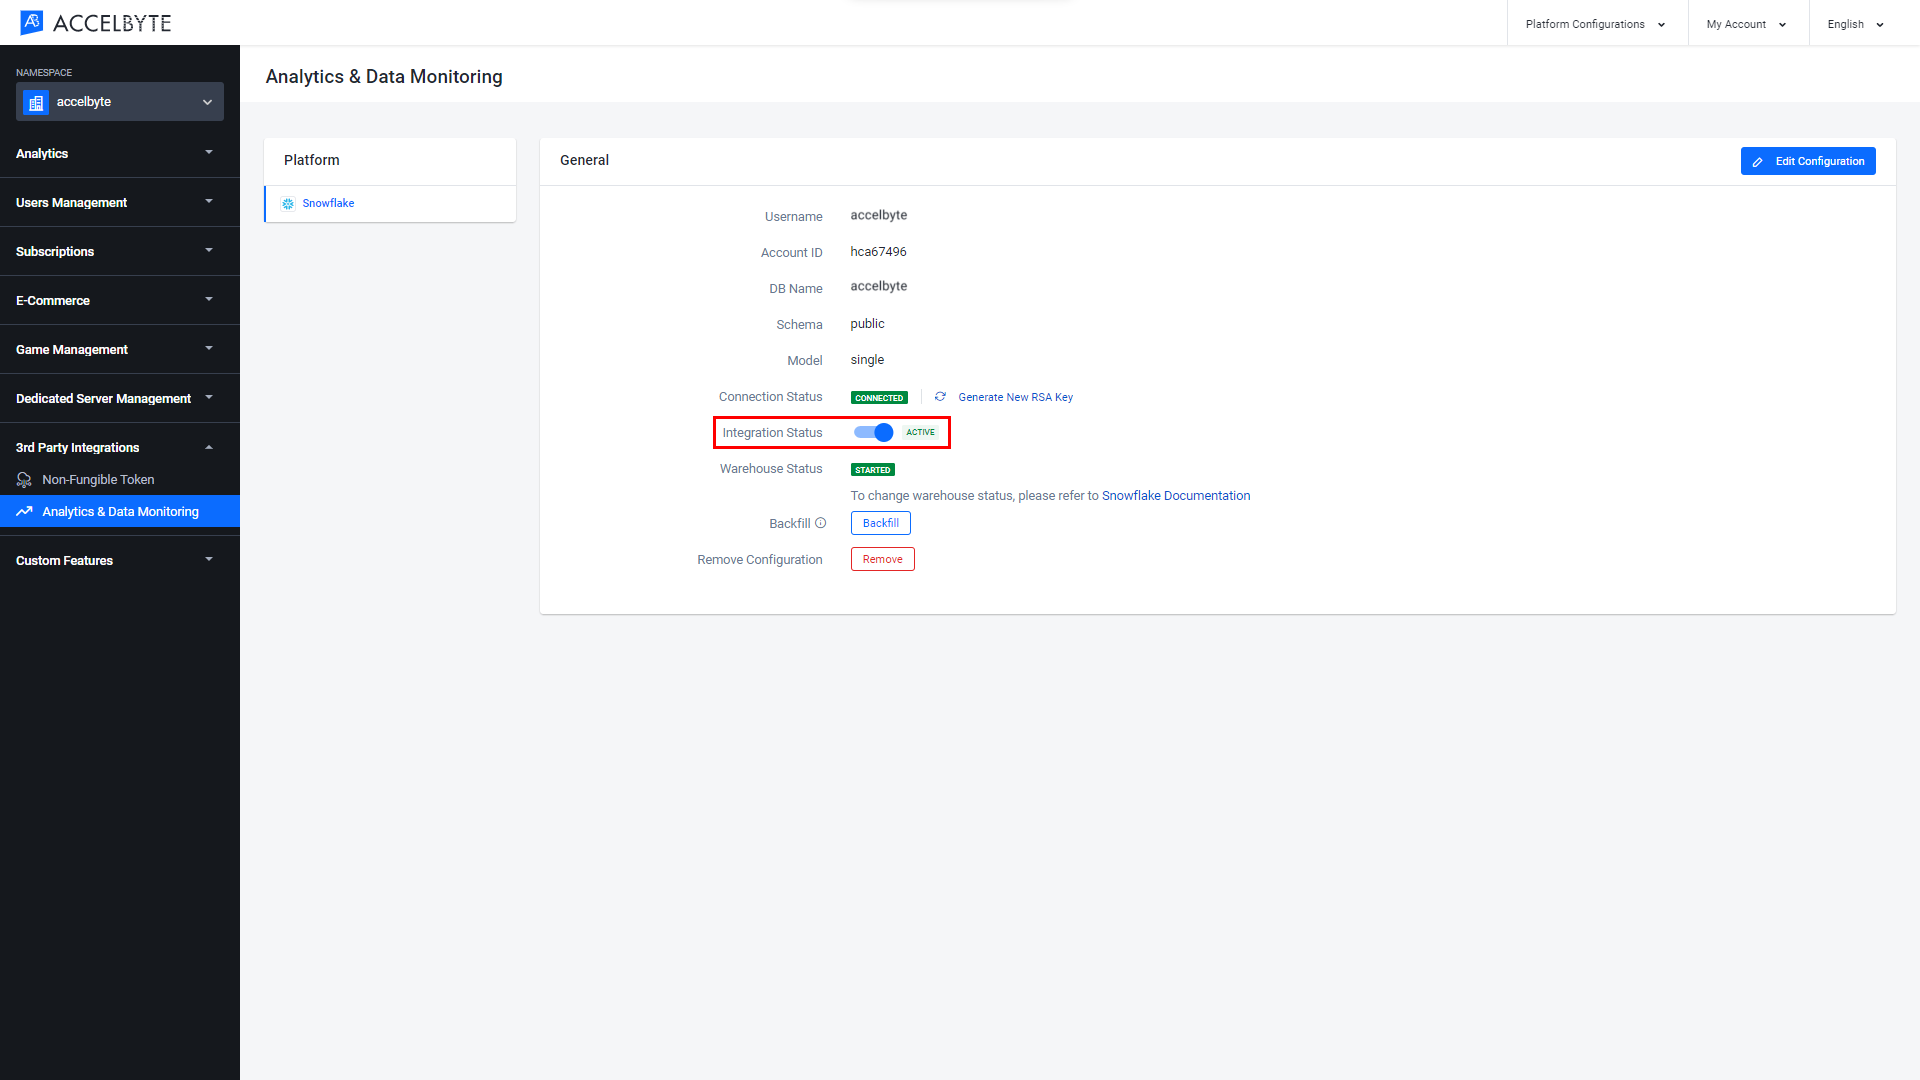
Once your configuration is successful, the Integration Status field will be changed to Active.

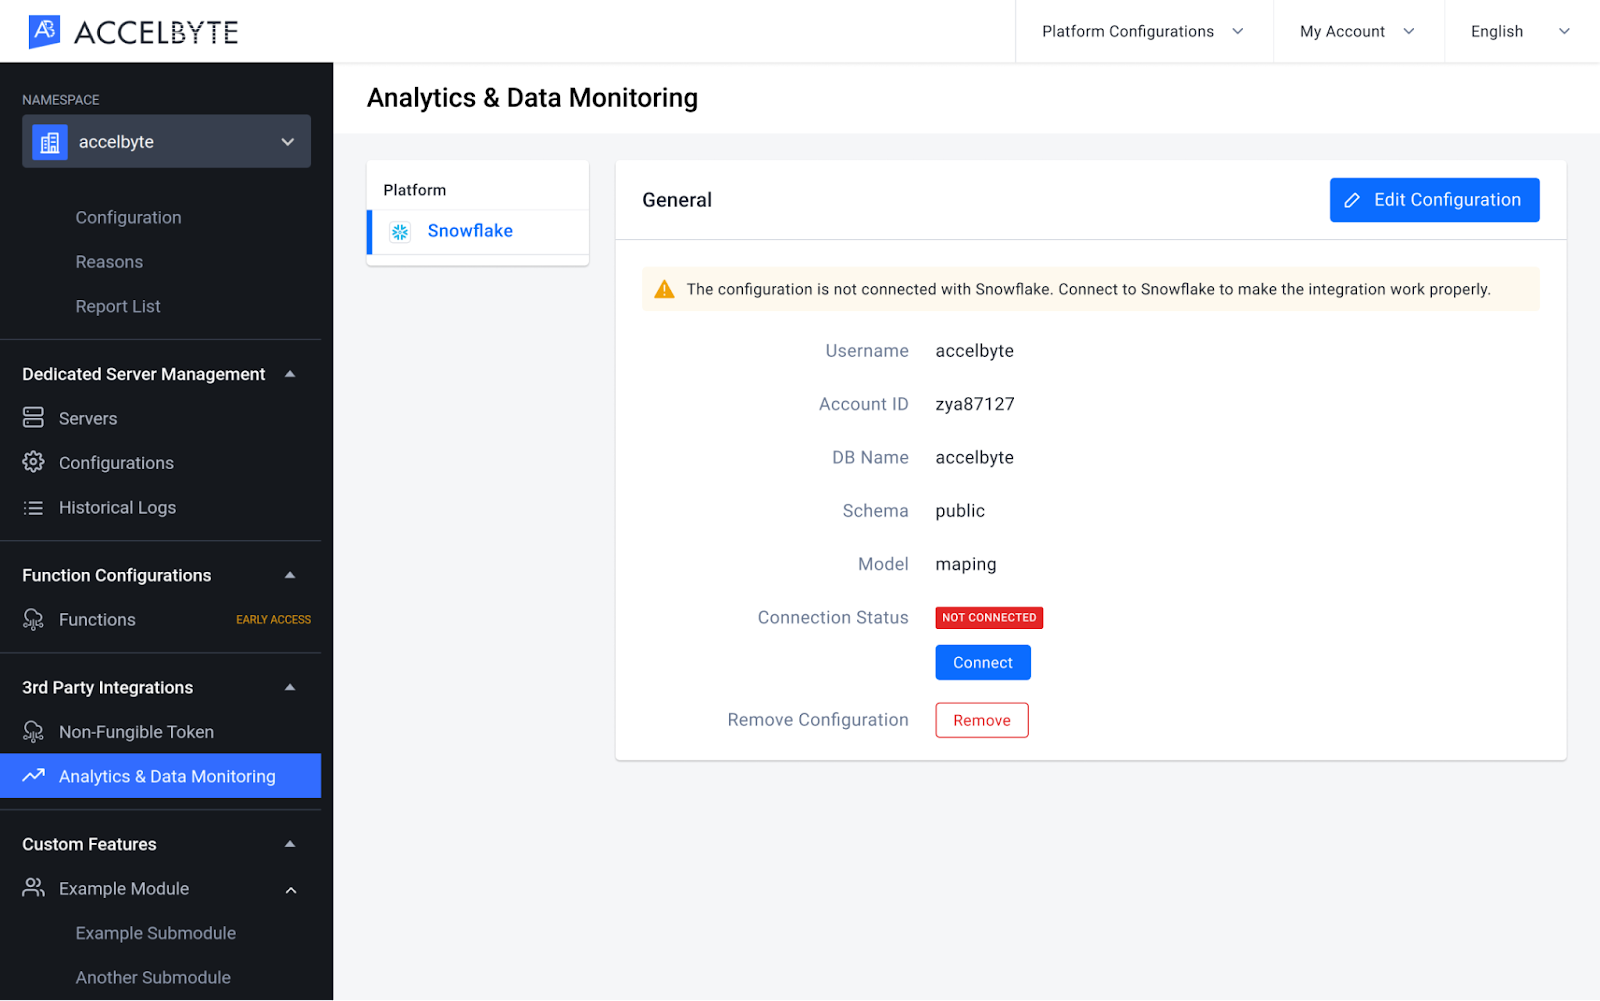
If your configuration fails, the Integration Status field will change to Deactivated and the Connect button will appear in the Connection Status field. You can click the Connect button to try reconnecting, click the Edit button to edit the configuration, or click Remove to remove the configuration.
NOTE
If your configuration fails, make sure all the prerequisites on the Snowflake side have been satisfied. Check the IMPORTANT box in the top of Snowflake’s documentation to learn more.
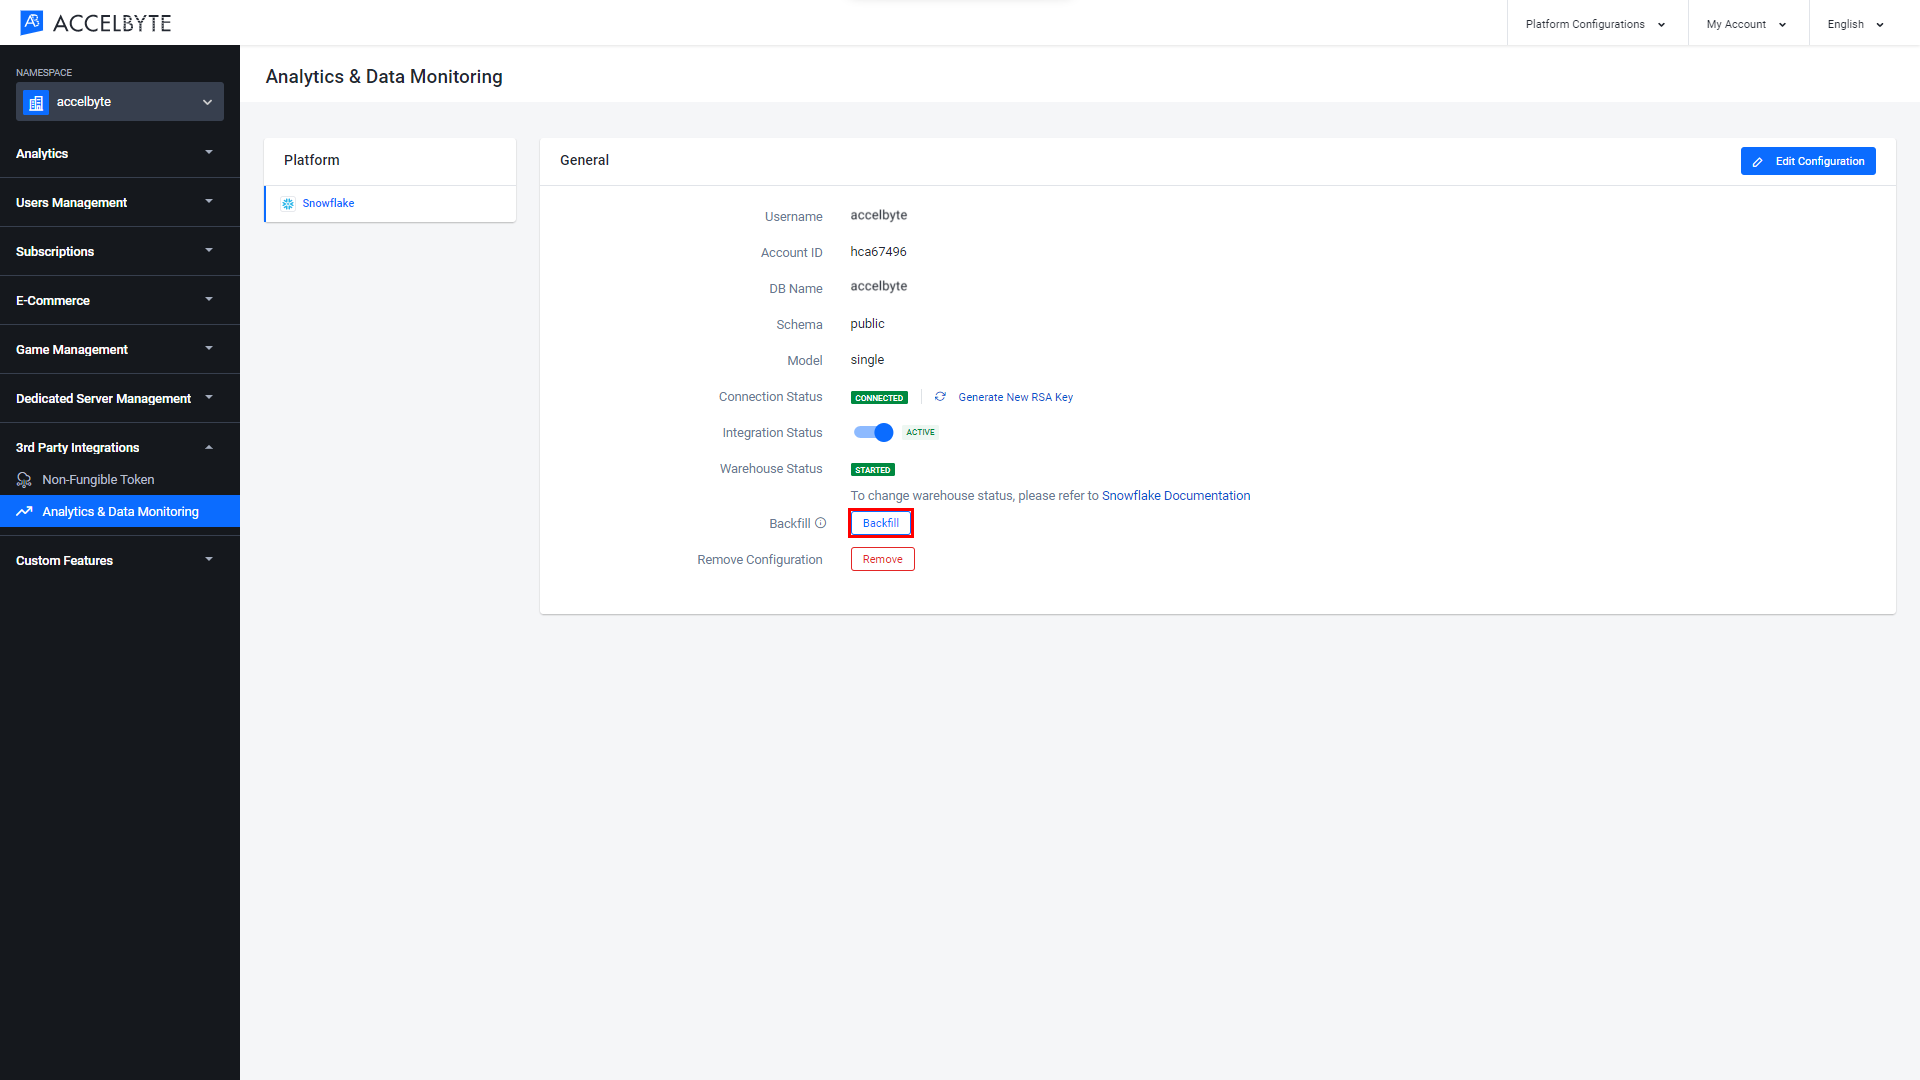
If your Snowpipe is missing data after you change the Snowflake Credentials, or data has disappeared due to a connection issue, you can use Backfill to run past scheduled pipelines and fill in the missing data.
NOTE
Ensure you have activated the Snowflake warehouse before using the backfill feature.
The backfilling process will run in the background. Refresh the page to see the latest configuration status.
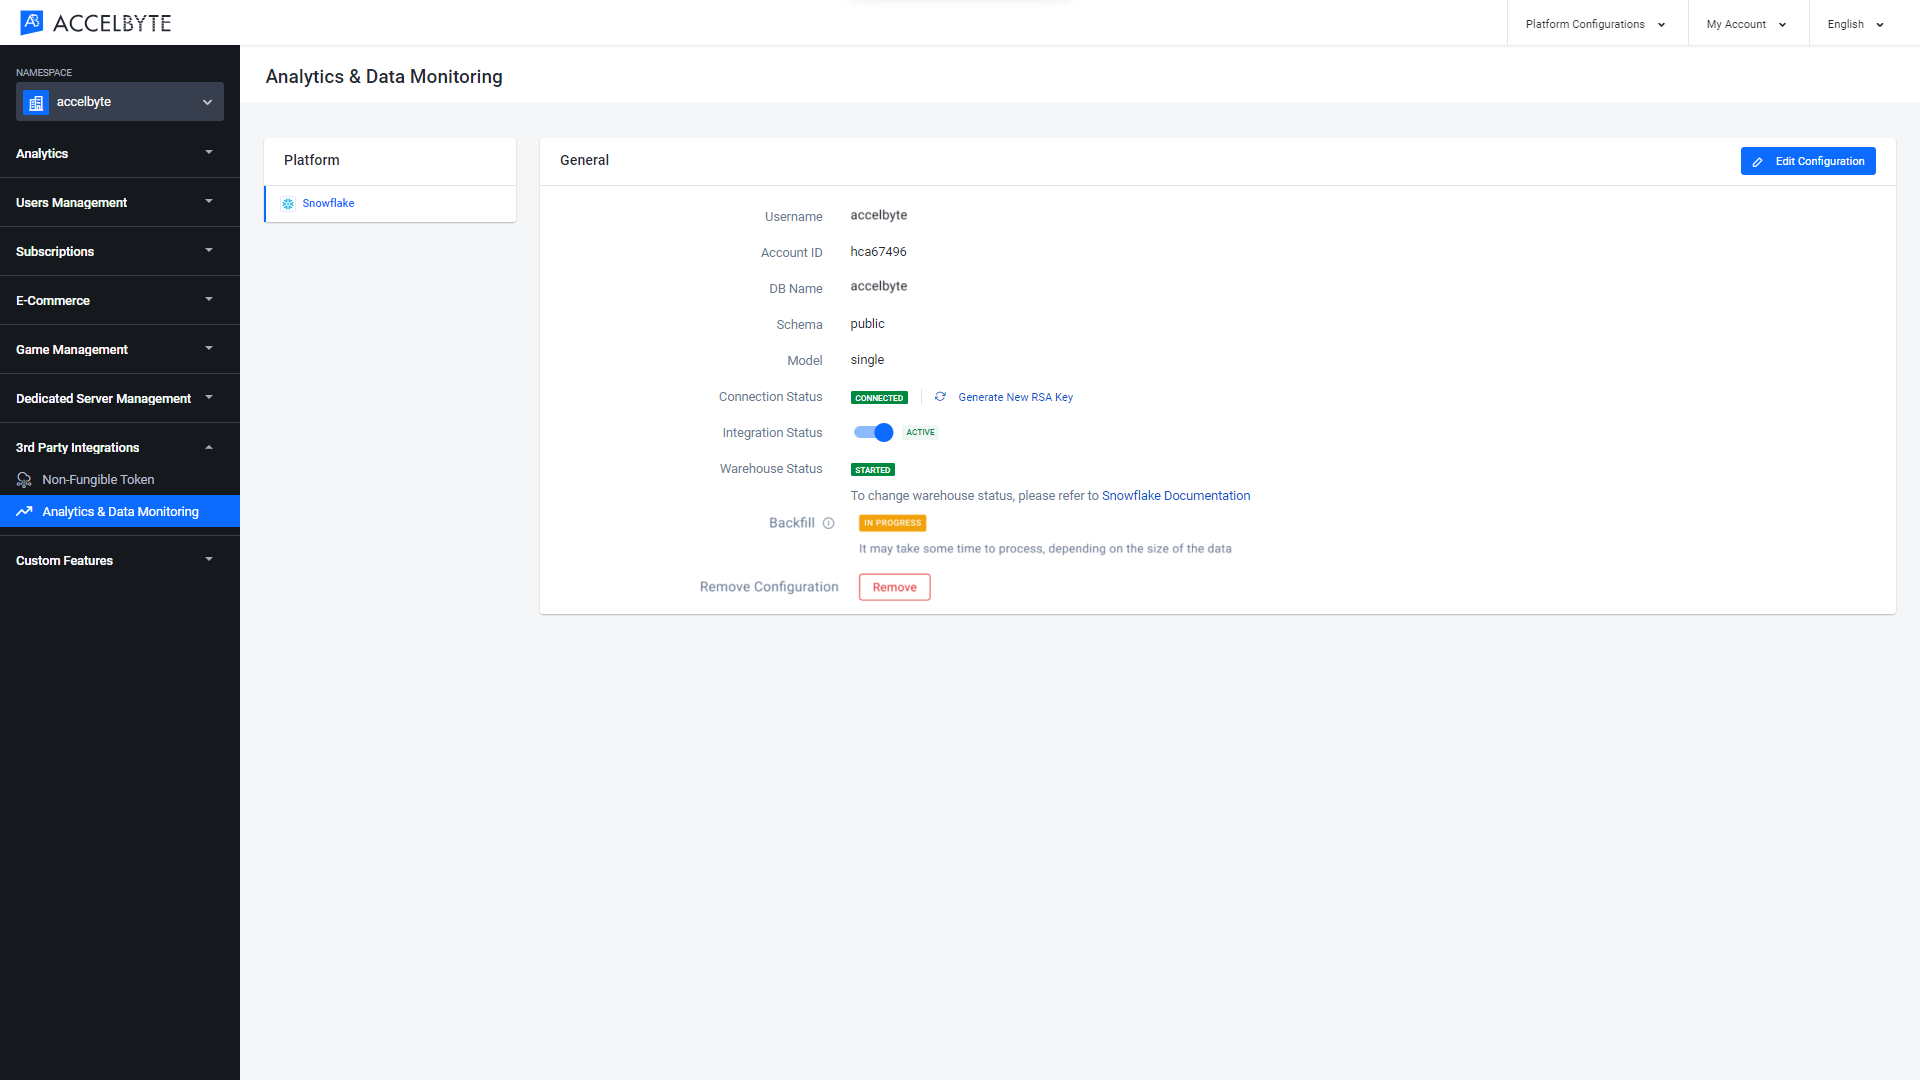
Once backfilling has been completed successfully, a confirmation will appear on the configuration page.
TIP
If the backfilling fails, recheck your connection and ensure that:
Once the integration is successful, if you want to regularly update the RSA Key to ensure connection security, you can generate a new RSA Key by clicking Generate New RSA Key next to Connection Status on the configuration page.

The Snowflake integration will be disconnected and you will need to reconnect Snowflake.
In the publisher namespace of the Admin Portal, go to the 3rd Party Integrations section and open the Analytics & Data Monitoring menu.
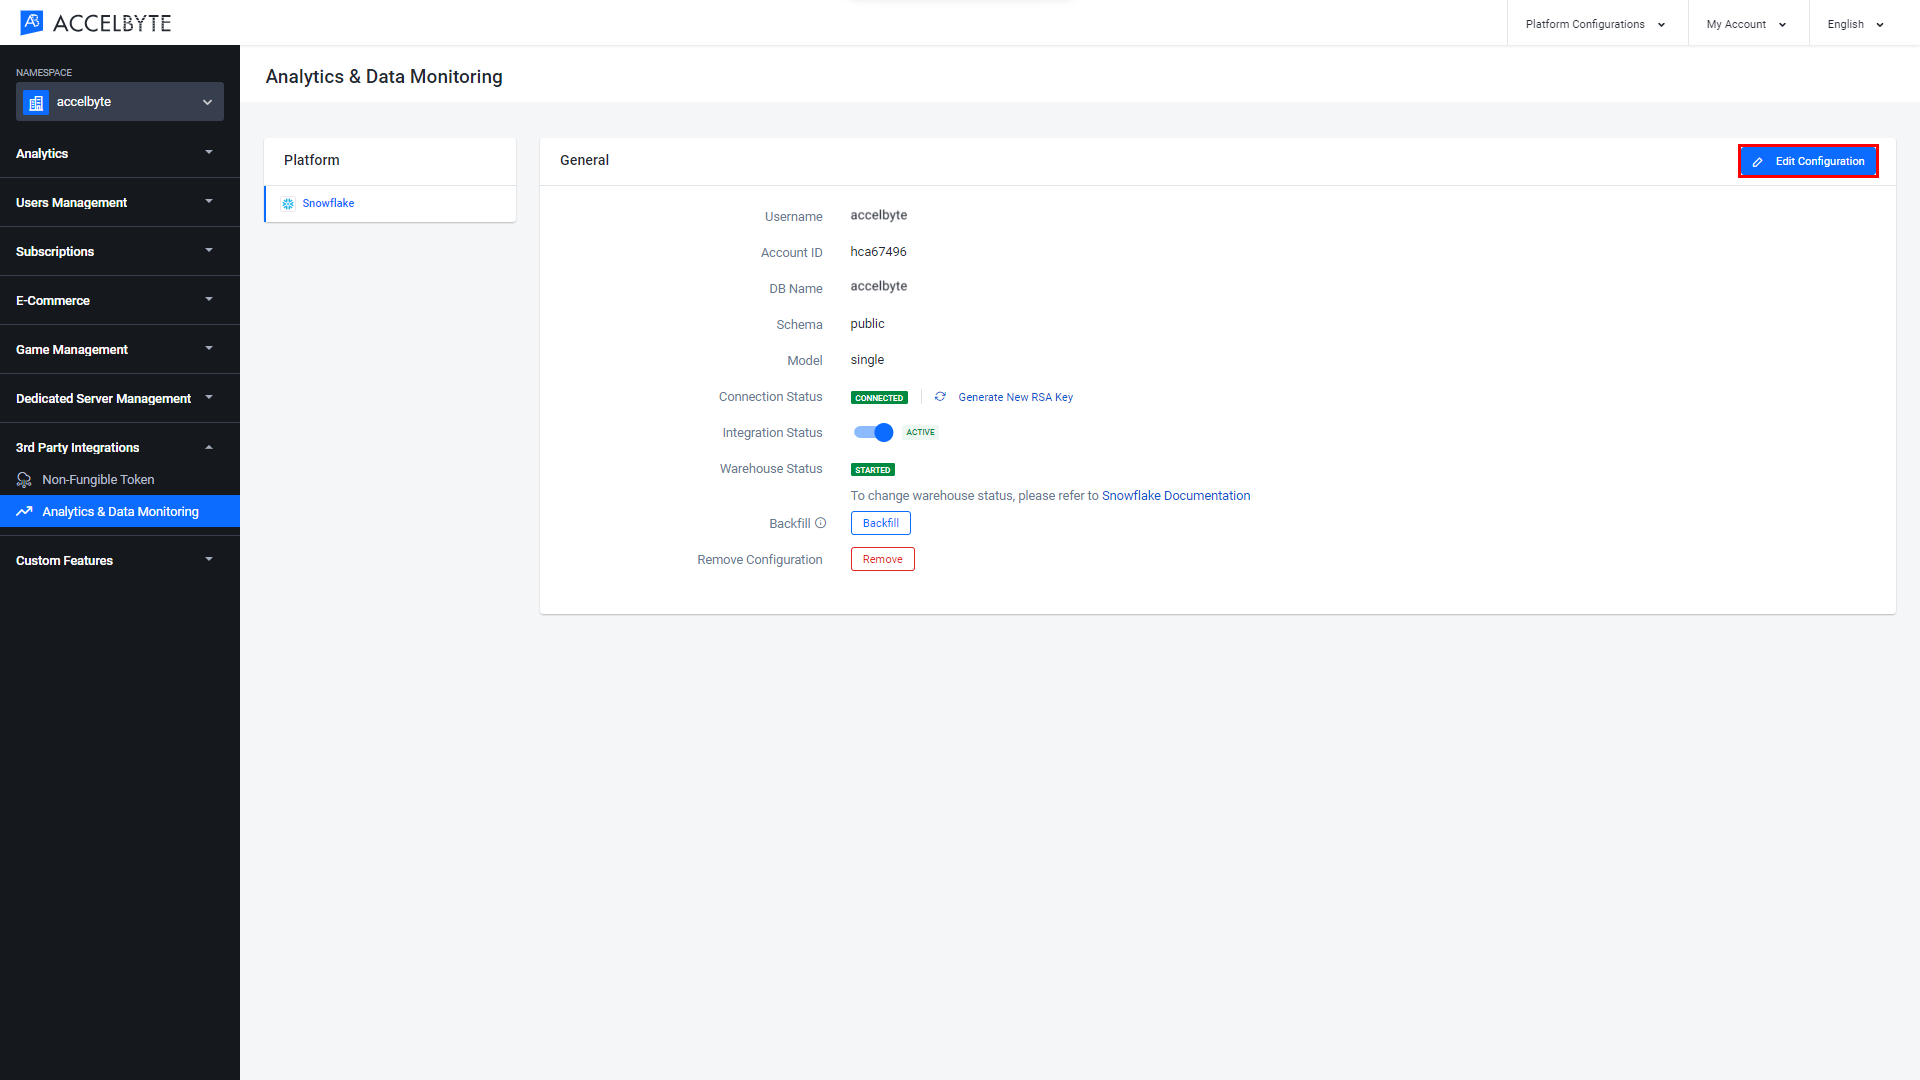
In the Analytics & Data Monitoring menu, click the Edit Configuration button.
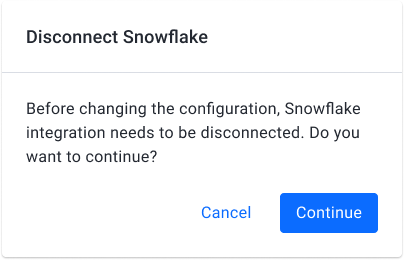
Before editing the configuration, it must first be disconnected. The Disconnect Snowflake form appears. Click Continue to disconnect the configuration and proceed to the editing form.
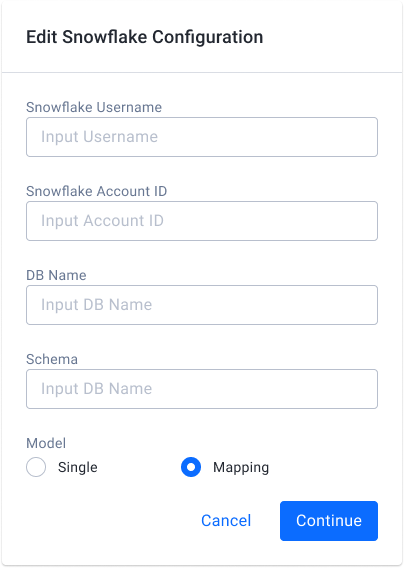
The Edit Snowflake Configuration appears. Fill in the following information:
Enter the Snowflake username of the user that will be responsible for this data in the Snowflake Username field.
Enter your Snowflake account ID in the Snowflake Account ID field.
NOTE
The Snowflake Account ID is the prefix before .snowflakecomputing.com in your Snowflake account url. Example: if your Snowflake URL is rsa42644.us-east-1.snowflakecomputing.com then the account ID is rsa42644.us-east-1.
Once completed, click Continue.
The Connect to Snowflake form appears along with a Public key. Copy the Public key and paste it into your Snowflake configuration script.
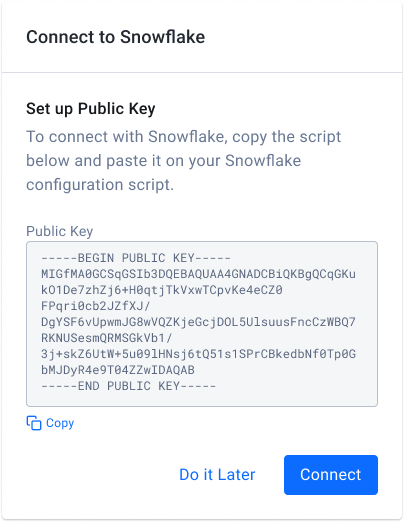
IMPORTANT
You must complete this step before moving on.
After setting up the public key, click the Connect button. You'll be redirected to the Analytic & Data Monitoring page. Most likely, your configuration is still in progress. You can refresh the page to see the latest configuration status.
If your configuration is successful, you can see that the Integration Status field will change to Active and the Connection Status field will change to Connected.
If your configuration fails, the Integration Status field will change vto Deactivated and the Connect button will appear in the Connection Status field. You can click the Connect button to try reconnecting, click the Edit button to edit the configuration, or click Remove to remove the configuration.
NOTE
If your configuration fails, make sure the Snowflake user ID you entered earlier has the ability to create a table in the provided database.